Added support structures for mast and the canvas roof
This antenna thing (radio direction finder) was really difficult to make out of random PE parts i found. The kit(1942 Tenryu) and most WWII IJN ships have the circular version, but 1926 Tenryu did not.
Antenna mounted, also completed rear torpedo resupply crane
forward AA platform, this was modified from a spare platform belonged to another ship, the kit’s platform doesn’t match 1926 Tenryu.
Depth charges
Before painting, i also decided to glue the life boat davits. I thought since i already added most stuff, might as well make the masking and painting even more difficult….
bridge and main mast
turrets: the plastic part is really thick, i had to shave them down abit with a file. Only the edges are reduced, giving the illusion of thinness
the blast bags are made from regular mr hobby putty. Originally i tried to use tamiya 2 part epoxy putty, but it didn’t really stick to the gun barrel. Using the standard putty was actually pretty good because i can use lacquer paint thinner to smooth and shape it.
i decide to take a good photo of her with all the golden PE parts before painting
Started with black primer (1500 mr hobby surfacer)
I made this “scraper” tool out of a bad tweezer, the hook shape is useful for this kind of things without damaging the railing. Also, i did knock the forward mast off by accident, luckily it snapped clean off.
shiny!
Masking with tape cut into little rectangles. This cutting template is really useful but it dulls the blade quite fast.
After painting the primary color, masking tapes are slowly peeled off
Basic color complete!
I noticed the rear mast was a bit too thick towards the top, i made a new one.
i added some very vague instruments for the bridge. It’s not really accurate, but it looks better than empty.
The canvas roof is something i been worrying about since the start of the build, i didn’t want it look too thick like a cotton blanket. But i didn’t find any good material other than normal tissue paper. So i separated it to the thinnest layer and went ahead.
I put PVC glue on the tissue paper, it absorbed it really well
Once it hardens, i painted it and other canvas parts with white oil paint Btw the dark and bright area on the hull is created simply vertical brushing with tamiya’s black panel liner wash, they seem to diffuse nicely when applied just the right amount.
It still looks abit too thick, but i think it looks pretty decent
Only rigging and weathering remains to be done. Weathering is pretty minimal for 1/700 scale, and rigging is hard to capture with camera, so ill leave it here, hope you enjoyed looking at this build and look forward to the final result!
This was supposed to be a ‘fast stash clear’ build (started in June 2020). But i haven’t had much time to model, and as time dragged on, i started to pay more attention to details, and attempted new techniques, so this project might take a while to complete….
The kit is decent (made in 2015), my complaints are: – Anchors are molded onto hull – PE funnel caps requires folding to achieve the desired height – bridge’s conning tower is moulded in halves, difficult seam line.
Due to me had a very memorable Tenryu game when i started playing WoWS, i decide to make the WoWS Tenryu instead of the kit’s 1940+ Tenryu. The main modifications i must make is the bridge (more exposed with canvas roof), and mid ship structure is not joined. From my limited research, WoWS Tenryu seems to be modelled after what she looked like in 1926.
The Build:
I begin with the bridge, the conning tower seam line was really bad, i had to use styrene to re create the slit windows.
I never tried to add panel lines to my ships, so i decide to try it here.
I also decide add PE portholes on the ship hull… i should not have done that because most photos of the Tenryu barely shows any extruded portholes. And it was tedious.
I cut the mid ship structures, and removed most of the details
started work on funnels
The WoWS Tenryu had a series of vents around the funnels, i really wish i had a 3D printer, as the styrene ones i made are abit uneven.
at this point i just have cross my fingers to hope they look good after painted.
Tenryu had some very tall masts, another reason i want to build the WoWS version, the 1942 version had a shorter front mast.
realized the torpedo cage i made earlier was a bit too short
added funnel caps, I wish the PE was thinner
The most boring part of the build: IJN linoleum deck bracket strips. I spread the work over 3 month, i would add one or two strips every day and it was finally over! In future i would look for PE decks for this kind of ship.
Hand rails for the funnel, i lost the one provided by the kit, i had to use some spare railings. i only glued the front and back of each railing, less chance of showing glue marks.
At some point during the build, i was really displeased with the portholes, i finally decide to rip them all off and went for a more simpler “scribing” method for the panel lines.
I used some back wash to check the lines, they are abit exaggerated, but with this experience, i will be confident to work on my USS Saratoga’s hull in the future.
The most difficult parts of the build are done, now i just need to figure out what the heck this is.
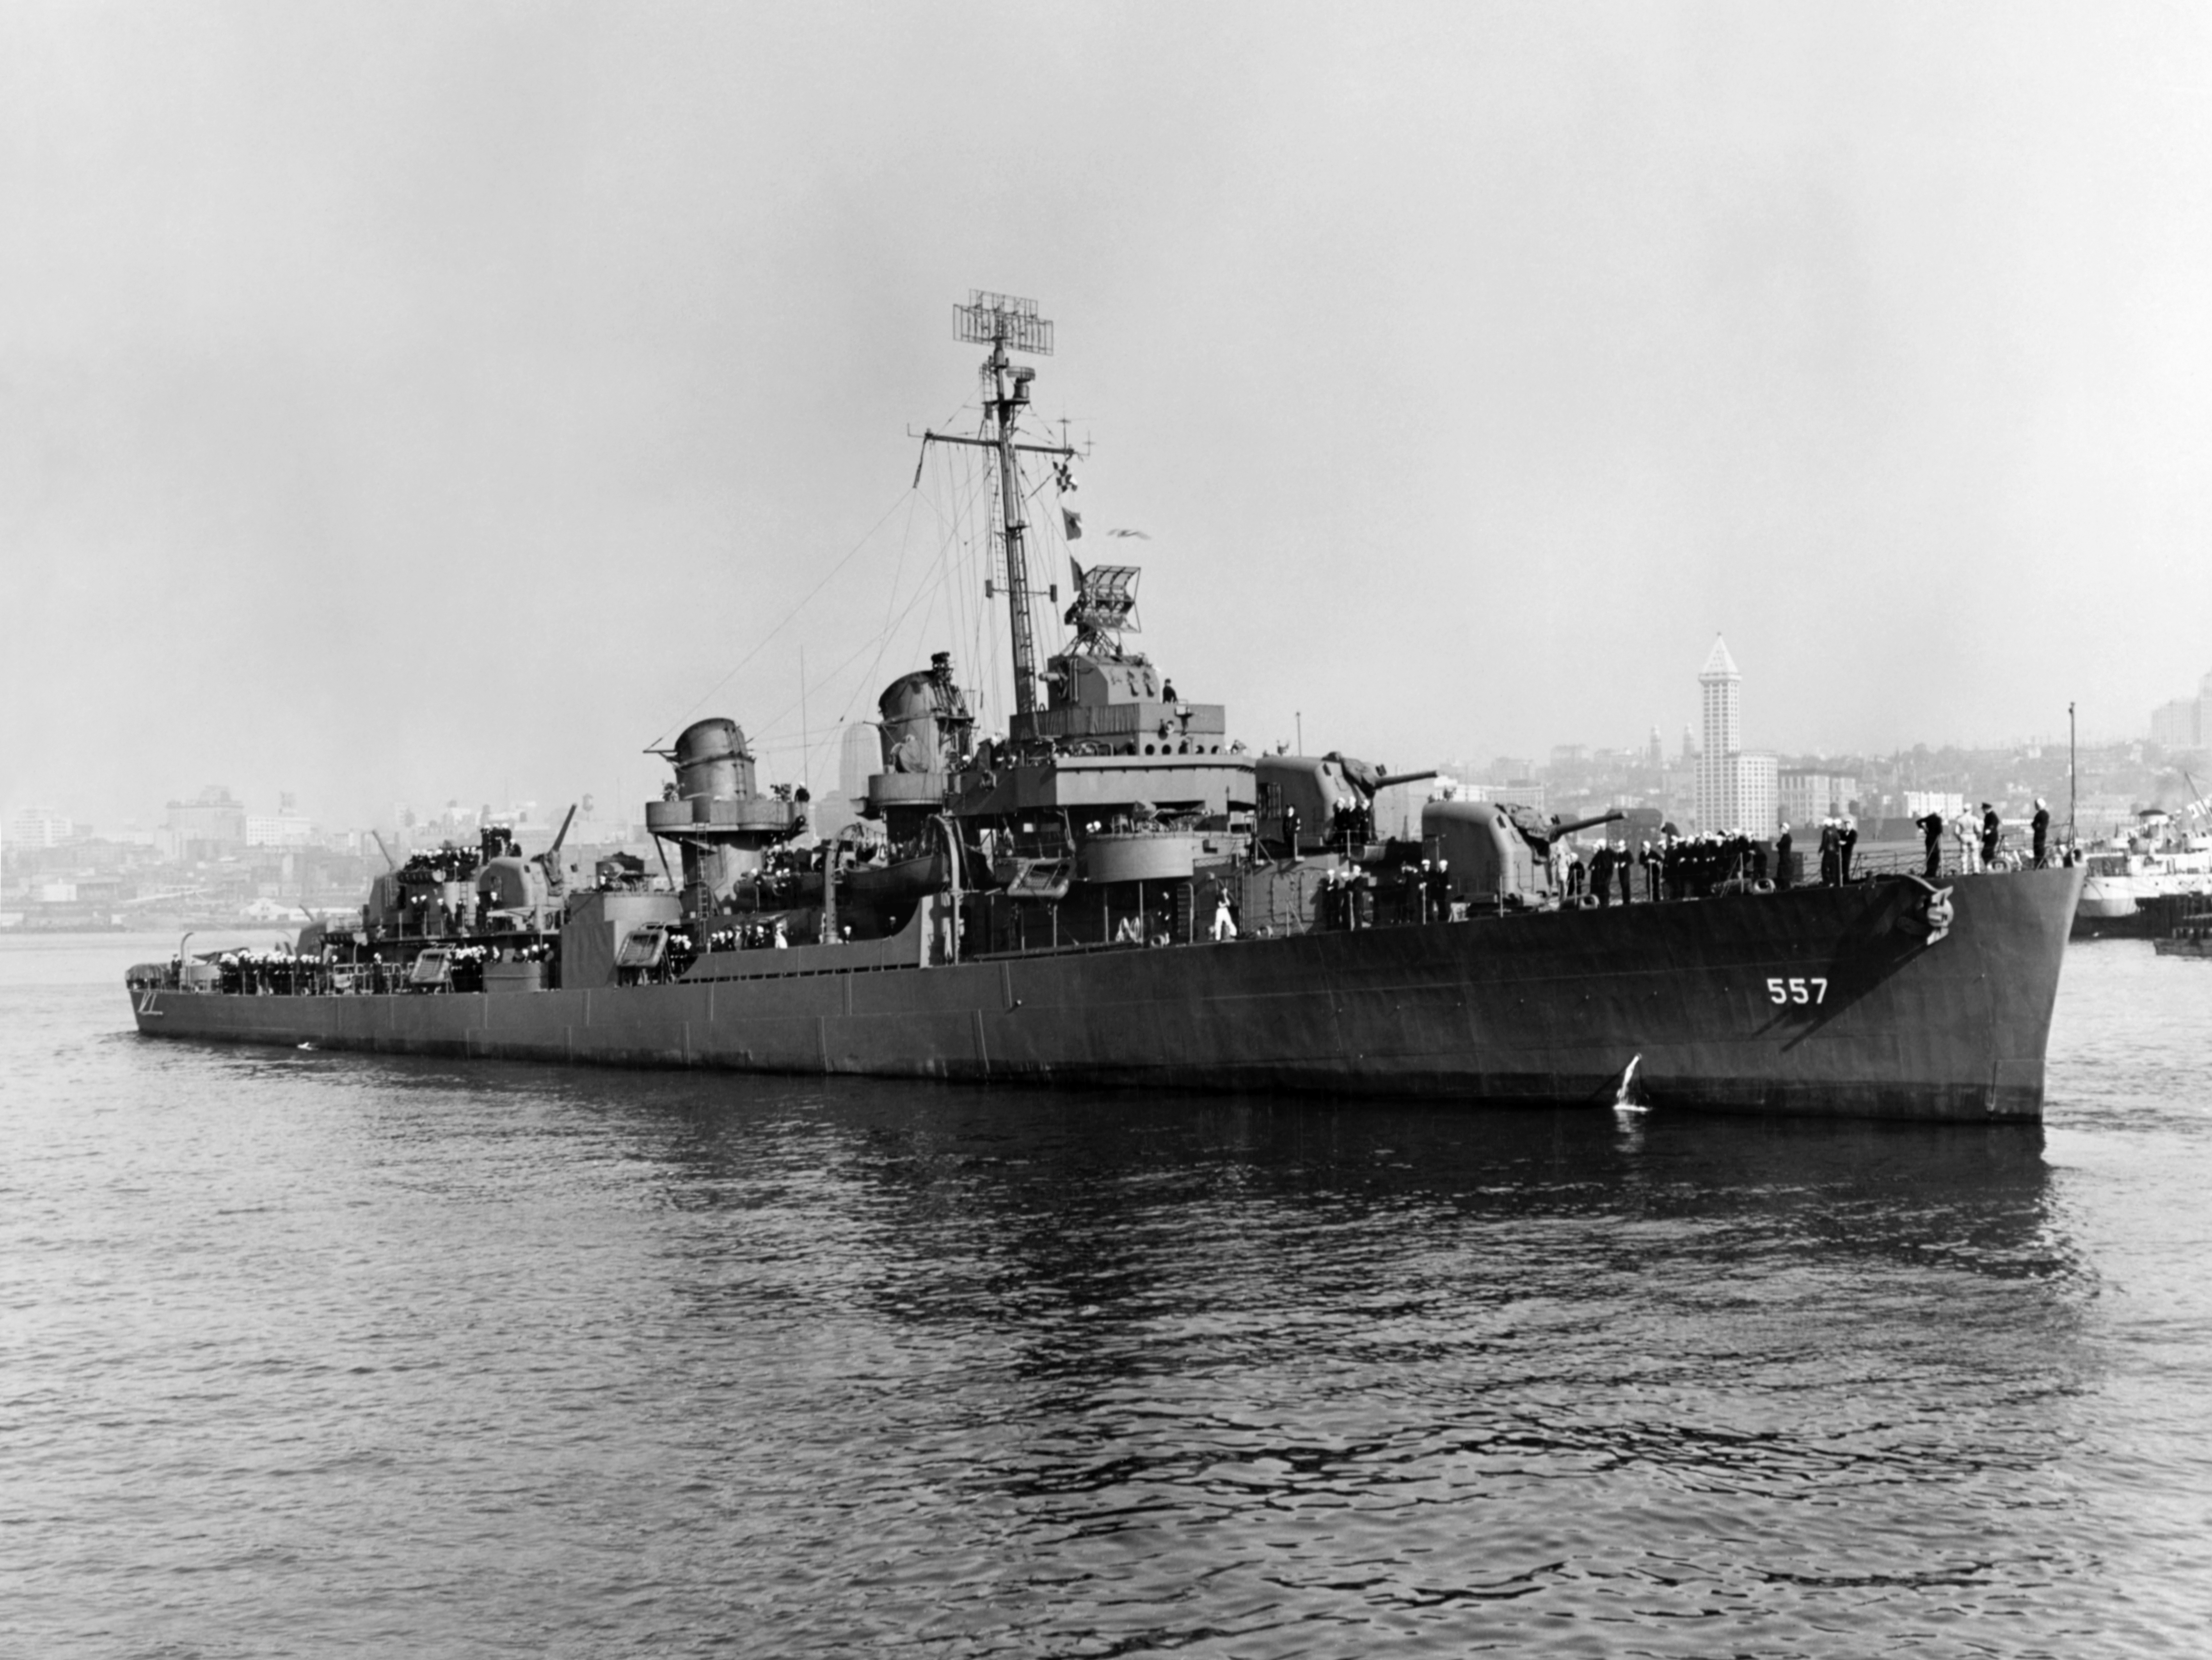
On 22 October, 1944, she was part of the lightly armed Taffy 3 when they were jumped by the IJN’s Center Force. This included 4 battleships, one of them Yamato. Admiral Sprague issued his famous order “Small boys attack” and Johnston made her run in attempting to line up for a torpedo attack. While blazing away at the Japanese ships with every torpedo and shell they had Johnston’s bridge was hit by 6” shells probably fired by Yamato and she also took four 14” shells. At the same time her torpedos went home into IJN Kumano and blew off her bow. The shell hits severed part of Captain Evan’s hand, but he made his way to the emergency steering position at the stern. The 14” hits effectively killed the engines so Evans ordered abandon ship. The last time he was seen, he was still at the emergency steering position waving to his men with his one good hand. It was said that as the Japanese heavy ships passed, they saluted the sinking Johnston, as they considered her worthy.
The ferocious fight put up by the light forces of Taffy 3 convinced the Japanese that they were running into much heavier units than anticipated so Center Force turned back. Johnston and the other ships in the force had done their job.
Of course Ernest E. Evans received the Medal of Honor posthumously. He was 36 years old.
“This is going to be a fighting ship. I intend to go in harm’s way, and anyone who doesn’t want to go along had better get off right now.” -Ernest E. Evans. Commissioning USS Johnston.
Above is updated (21/01/2021) photos of the model shot using a proper camera (Panasonic GX9 + 60mm macro lens) with proper lightbox, without any post editing. The color is much more accurate, with greater quality!
Below are original photos of the model shot using an iPhone XR.
Yukikaze’s new friend
Some details are pretty blurry, as you can see my phone camera is pretty much at it’s limit, i think it’s time to empty the wallet and upgrade to a proper camera… Anyway, this is the first US warship model I’ve ever built, before that I only built IJN and Royal navy ships, which are somewhat similar. What’s great about US ships is that there are a tone of reference materials, i had great control on the level of details i wish to model.
I’m aware the ship hull number decal is wrong, but it was a compromise i had to make as i couldn’t get a set of ww2 USN number decals. I found one shop on ebay was selling a sheet for $20 with shipping, i decide to settle with the one i had.
The most challenging part of the build was trying to make the model look more interesting after painting, it needed every bits of colour it can get. After this build I understand why there are not many good looking ships models painted in measure21 (navy blue), it’s just very difficult to bring out the details.
Overall i’m satisfied with the result, shes definitely a great looking ship!
Can’t find aftermarket part for these, so i made them out of styrene and ammo box PE parts
torpedo cranes added
Originally did not plan to add handrails on the funnels, but after examining the photo of the Johnston, the handrails are clearly visible.
Added the X shaped support under the first funnel platform, i missed this detail at first.
speaker and range light
oerlikon cannons made
Final look at her before painting!
I decide to mask the anti skid pathways so it would appear darker than deck color, in most fletcher builds i seen this step is ignored, but since shes going to be entirely blue, this should make it look more interesting
here can see the anti skid result, looks pretty neat, now masking the deck for hull painting
First look after painting. To my disappointment, the deck blue and hull blue looked almost identical in the end result,… the ship does look a bit dull, I guess masking the anti skid was the right choice.
attached weapons and done a light wash. The wash makes the blue color less vibrant, the model looks much more realistic now.
In this picture the model is well lit, the blue appears much lighter just like how Measure21 would look under sunlight. In person, the overall color is still pretty dark compare to other ships I’ve built.
Hopefully adding some deck items will give it some color!
Side profile is checked against a blueprint, looks about right, a good start for the model!
Gun director and mast completed, the signal lights on the mast was later changed to a thicker piece of styrene
this file is useful to get rid of little nubs on the PE parts
realized the bofor tubs isn’t a square…. had to pull the original PE out, and replace them. The more you do this, the more glue residue is left, and the model looks less clean, so it’s always best to do plenty of research first
added little lips above the doors using 0.2mm wire, and some other details on the sides
4 strand braids using 0.1mm jumper wire as anchor chains, technique learned from book: Ship Models from Kits by David Griffith
Side depth charge cage, the johnston had a shorter single row cage, had to chop the PE parts up and modify it into the smaller cage
doesn’t look as neat as the original… but at least it’s more accurate, doing all 6 cages cost me 3 new blades as the PE part was quite thick to cut
details added on the first funnel; More side details, notice the gaps i left for the fire hoses, i plan to add them in after painted, since they are white colour and will be difficult to paint if i stick them on now.
little support fins added, these isn’t part of the PE set, i had to cut them up and it was difficult to get them to the same length… in the end it was still a bit uneven
model is roughly 16cm in length
IJN 127mm barrels are used since i had a bunch of them, since the mk12 is also 127mm caliber, it looks about right.
still quite a few details missing in the aft section
Had to reposition all of the outer railings because i didn’t leave enough room for the fairleads around the ship… rookie mistake
I used Yukikaze by Hyun Soo Kim as a reference for the rigging
IJN yukikaze, Kagero class, one of the well-known destroyers in WWII, also called the lucky destroyer due to surviving numerous major battles while being relatively unharmed, after the war she was transferred to ROC and served until 1966.
Due to carelessness, i mixed thinner containing alcohol with lifecolor acrylic paint, the result was dark, sticky paint that nearly ruined the model. Lesson learned: should always test spray when using a product for the first time. I managed to paint a third layer, covering up the mistake, but it also made some thin PE details look very thick.
First time weathering with oil paints, i think it turned out well. I was surprised how well oil paints sticks to the model, most of the white color was oil paint, they paint much better than the tamiya xf2 white, which gives me headache sometimes.
I added spare motor boats as the kit didn’t come with any. The motor boats are a bit larger than what they should have been, i would switch them out when i find suitable ones.
Overall if ignoring the paint clogging some of the detail, the model turned out pretty nice, maybe i could of painted the AA guns in a lighter color so it would be more visible.
Ocean Base: On December 2020 months after the build, i decide to make my first ocean base and i chose Yukikaze to be the ship! I follow the guide made by Jim Baumann, and it turned out beyond my expectation!
As the first base i made there are mistakes, the most obvious one is that there shouldn’t be wierd double waves, It was too late when i realized the issues so i just went with it. I should also improve the bow wave next time, it’s abit too far ahead of the bow and spread out too much. Unlike the guide i didn’t use cotton or fluffs, personally i dislike how waves made out of cotton looks. Instead i just use tissue paper hardened with super glue. I used to prefer waterline models without ocean base for the clean look, but after making one myself it changed my perspective. Ships do look better with oceans after all!
This Flyhawk Kit is very detailed, i was really impressed by the detail on the pom-pom guns, not much aftermarket needed (only needed davits, reels and chains). Did scratch made the crest from a ship porthole PE piece, i’m very happy with the result. I really look forward to future Flyhawk kits like the KMS Gneisenau and HMS Illustrious.